Monday 27 August 2012

Lunch Love Part I: Fruit Fun

The phrase "Back-To-School" is buzzing through the air everywhere I go!  I'm certain that many fellow parents looked forward to summer holidays as an end to lunch making, but here we go again... 

I wanted to share a few ideas for lunches to start the new year.  Let's skip the mains for a while (gotta ease into it, you know) and have some fun with fruit.  If you have a few bigger cookie cutters or a knife you are adept with and some toothpicks or 6" / 15 cm skewers, you can make regular fruit offerings more appealing.  As the saying goes, we eat with our eyes first!


Apple Stars

Cut the apple across between the blossom end (on the bottom) and the stem end a.k.a. pedicel.  (Yeah, I had to look that up, lifelong learner, you know!)  When you cut the apple this way, stars will be revealed in the middle of the slices.  Secure the slices with a clean elastic band and the slices won't brown.  There's a story to go with this called "The Little House with No Doors and No Windows and A Star Inside."  Read it here if you don't know it; it's pretty cute and a kindergarten apple unit tradition at our school!


Banana Art

You can Google this term for ideas - one year, I had to make about 10 banana giraffes for my grade four students because they loved them so much! You could also create an octopus quite easily, eating the other half of the banana yourself before packing it up.
A new thing I learned from a student's family last year was that if you use something dull and pointy, you can "write" a message or draw a picture on the banana in the morning, and the secret message will revealed by lunchtime. I wish I'd known that idea when my kids were younger.  I guess I could still do it now as long as it wasn't too gushy or cutesy for 12- and 15-year-olds!


Fruit in a Cone

After discovering this idea on Pinterest, I arranged a station for making them at Miriam's birthday party breakfast. If you choose to do this, do check the size of the cones; I was disappointed at how small the sugar cones actually were when I got them out of the box and how little fruit would fit in them. :-(   A small-diced fruit salad might work well for small cones but I'm sure the regular ice cream cones would be fine if the fruit wasn't too juicy.


Fruit on a Stick

Play with colours and patterns - grapes, blueberries, raspberries, smaller strawberries, cut shapes, etc. You could even add a different fruit on the top for a wand-like look. Tell your child you need the skewer back. (This is a trick I learned from my friend and co-worker, Kathie, when there were fruit kebabs and sandwich-on-a-stick served for hot lunch - no lunchtime spearings in her classroom!)


Frozen Grapes

No skewers? Wash and freeze grapes in a reusable container. If you have small children, you may want to slice the grapes in half for safety's sake.


Orange Sunshines

Slice an orange in, well, slices, discarding/composting the ends.  Cut the slices in halves.  Set them cut-side down in a resealable container.


Raspberry Treats

Last Valentine's Day, I made these for my family.  How easy is this?!  Poke different types of chocolate chips into the berries for a nice surprise in the middle. 


I hope these ideas will spark your imagination for keeping your children's and/or your own lunches fresh and fun!  Thanks for making a pit-stop at the island. 
Get it? 
"Pit" stop?  
Fruit?  It has pits?  
It's a grade one humour flashback, I guess, except 6-year-olds say "geddit". 
 
I wish all my school staff friends as well as all of you education-related people and parents with their special treasures in cyberworld a wonderful new school year! :-)


Jennifer


P.S.  I promise to go easy on the puns in my blog...but no promises about alliteration!


Monday 20 August 2012

Four Fabulous Salads

I do love rabbit food
A crisp, cool salad can hit the spot on on a hot summer day.
Creatively adorned greens at the potluck table always catch my eye.
A few pieces of roughage on your plate can make you feel a bit less guilty about all of the traditional holiday foods you've dished up.

I hope you will enjoy eating these colourful salads with your eyes today and perhaps give one or two a try on your own...or ask me to bring one to a potluck. :-)
  
Are any of you fans of "Chuck's Day Off" on the Food Network?  Chuck Hughes is a chef from Montreal who creates a meal per episode for people connected to his restaurant business or the folks in his neighborhood: the man who sharpens his knives, local dog walkers, his produce suppliers, his "regulars," etcetera. 
I haven't made a lot of his dishes, but one we love is his Endive and Grape Salad with Pear VinaigretteIf you are not familiar with endive, to me, it looks like a tulip flower with its pale leaves which nest inside each other. It is also known as Belgian or French endive which may be useful to know in case the cashier at your grocer isn't sure what name to find the code under. In addition to being a salad ingredient, you can also use the boat-shaped leaves as an edible hors d'oeuvres holder for chicken salad or other things.  In the recipe, a new term to me was "brunoised."   This means to cut into tiny cubes with 3mm / 1/6 inch sides, according to Wikipedia, and that's what you do to the cheese for this salad. Click on recipe name above for the original recipe; I will add my comments and substitutions in green font in square brackets with the copied version below.

Chuck Hughes' Endive & Grape Salad with Pear Vinaigrette

Pear Vinaigrette
  • 2 cups of fresh pear juice (500 ml or approximately 4 pears) [SunRype Peach Pear in 1.36L bottle]
  • Juice of 1/2 lemon
  • 2 tablespoons cider vinegar (30 ml)
  • 1/2 teaspoon of maple syrup (2 ml)
  • 1/2 teaspoon of Dijon mustard (2 ml)
  • 1/2 cup of canola oil (125 ml)
  • A little water to thin, if necessary
  • Salt and pepper to taste 

  1. Heat pear juice on stovetop over medium heat to reduce to ¼ of its original amount, for 40 minutes, until caramelized. Set aside and let cool. [Get this step going before anything else as it takes quite a while to boil the juice down. I use a very small, heavy saucepan and boil it like crazy!]
  2. In a pan add olive oil and toast pine nuts on medium to high heat. Keep an eye on them because they tend to burn fast.
  3. In a bowl, mix the reduced pear juice, cider vinegar, maple syrup and Dijon mustard. Slowly add vegetable oil whisking constantly. Season with salt and pepper. Add a little more pear juice, or water if the vinaigrette is too thick. Set aside.
Salad
  • 4 endives, trimmed
  • 2 cups of red grapes, sliced in halves (500 ml)
  • 2 pears, julienned
  • 1/4 cup of pine nuts, toasted (60 ml)
  • 1/2 cup of mimolette cheese, brunoised (100 g approximately) [we used applewood cheddar; Chuck suggests Gouda or Old Cheddar]
  • 2 teaspoons of olive oil (10 ml)
  1. Place endives and grapes in a bowl, add vinaigrette and mix well. [I drizzled the vinaigrette over the top...I think I recall that I had almost double what I thought I needed...]
  2. Transfer salad mixture in serving bowls and garnish with pears, pine nuts and cheese.  [As you can see in the photo, I serve it on a big platter sometimes, and have also plated it individually.]

  
Christmas Jewel Salad

This is an original concoction, the one I was referring to in the intro to help lessen holiday food guilt!  I was aiming for lots of bright colors and to incorporate mandarin orange flavour into the salad.  It's not just for Christmas, of course, but we thought it looked mighty festive!
Ingredients
  • 1 box of mesclun / mixed baby greens  a.k.a. mixed weeds  (that's what Larry used to call them)
  • 1 cup Mandarin orange sections packed in juice or fresh orange sections (they just look a bit shinier without the membrane on them)
  • 1 cup of whole pecans
  • 1/2 pomegranate or 1 cup fresh arils (already-seeded pomegranate)
  • Kraft Mandarin Orange with Sesame dressing
Directions 
  1. Heat a small skillet to medium; toast pecans in it for 5-10 minutes, stirring frequently, until fragrant and browned.  Don't leave them alone for long!
  2. Remove seeds from pomegranate half, if using.  Here is a link to a way to deseed the fruit without looking like you had a terrible knife accident.
  3. Set aside 1/3 cup orange sections, 1/3 cup of pomegranate seeds and 1/2 cup of pecans for garnish.
  4. In a large bowl, gently mix greens, remaining oranges, pecans, and pomegranate seeds, and dressing to desired amount of coating.  Too much will make it really heavy; it's better to start with a little and keep adding until you're satisfied.
  5. Spoon salad out onto a large plate or serving bowl; garnish with reserved fruit and pecans.

  
Quinoa Salad with Apples, Walnuts, Dried Cranberries, And Gouda from Fine Cooking

Occasionally, I buy myself a unique cooking magazine for a treat.  It's always a very humbling experience but I did find a recipe for what looked like a very tasty salad in my last purchase of Fine Cooking.  At first, I was intimidated by the number of ingredients - 14, which seems a lot for a salad - and some which I don't use that often, such as:
  • Quinoa:  This is a fairly new grain to me.  My hubby teases me about couscous and its friends (think back to Cannonball Run: "Too much couscous!").  We can find a reasonable assortment of them these days out here, not always in bulk, but small packages are better than no packages.  The recipe suggested red quinoa, which I couldn't locate, and I think that brown variety contrasted nicely with the other ingredients' colours anyway.
  • Walnuts:  I hardly ever make recipes with these since I've had the unpleasant experience of tasting of rancid ones on too many occasions.  Hope for the best; I was lucky to get a good package and they added a nice flavour contrast.
  • Arugula:  This spicy green was rarely seen in northeastern Alberta.  I was excited to try it after hearing so much about it on the Food Network, but when we'd go to Edmonton and I'd order a salad with it, the restaurants had often run out of it!  Thankfully, within the last year or so, I can find it almost every week in Bonnyville!
  • Fennel:  Fennel looks like the end of a bunch of celery, rounded, with slender stalks topped with dillweed.  Do not fear it!  I think most people just wash and slice the large bulb end like celery.  The skinny parts of the stalk seemed to have a significantly more pronounced licorice taste than the larger ends.
  • Sherry Vinegar:  I had a very hard time finding this ingredient, but after a little searching on the 'Net, a mix of red drinking wine and balsamic vinegar was one of the suggestions and it seemed fine to me.  (Since then, however, I did find some at the Cold Lake Sobey's!).  The sherry vinegar has a more subtle flavour; if you prefer dressing with a bit more bang, go for the wine + balsamic combo.
The other items were more common things - sea salt, extra virgin olive oil, red onion, balsamic vinegar, Gouda, celery, Fuji or Pink Lady apples, dried cranberries, and freshly ground black pepper. 
        
Voilà!
It was deemed delicious by the whole family, even Mr. Couscous, and was definitely worth the game of Grocery Store Hide-and-Seek.  The full recipe is located here.  Thinking about the salad while mid-post writing motivated me to buy the ingredients yesterday.  Guess what we had for lunch today? :-) 

Notes:
  • You might want to mix just 2 tbsp / 30 mL of the olive oil vs. 2 tbsp of it with the sherry vinegar and S+P to make the dressing; I found it a little oily today.
  • Also, the recipe called for 4 oz / 225g arugula which it listed as equivalent to about 3 cups.  I found that the volume was double for that mass, so I put in about 4 cups / 1L of the greens.

  
Asian Slaw with Ginger-*Peanut Dressing from "Once Upon A Chef" Blog

The fourth salad was a find on Pinterest; it was one of my first Pins on my "Foods I'd Love to Make & Eat! board.  Another Jennifer (and a real chef!) invented it; her website is www.onceuponachef.com.  You must check out her original recipes, the mouth-watering photos, and excellent step-by-steps.  -Sigh.-  Something to work toward... :-)  Jennifer The Chef gave me permission to show the picture and link to the recipe.  Her salad is so colourful, crunchy, and tasty!  I was sure I'd taken a picture of it one of the many times we made it this spring, but perhaps my now 40-year-old brain isn't as reliable as it used to be...  I've been asked for the source of the recipe many times already.  The most time-consuming part is making the dressing; I usually get my kids to make that part while I assemble the rest.  Not everyone likes it really spicy so I omit the Sriracha sauce, and it seems people either love or hate cilantro, so I leave that out as well. 
asian slaw

*I have made it with and without peanuts and incorporated Wow! Butter (soy equivalent to peanut butter) which my friend purchased for me at Wal-Mart.  I find the Wow! Butter has a slight taste of sesame but it goes very well with the other Asian flavours and give you some peace of mind that you won't accidentally harm someone with a nut allergy.  A girl my daughter's age has such an allergy, and her mom was really happy when I told her before the potluck meal that the salad was nut-free and safe for their family to try!


Thanks for hopping to the island for a nibble!  Keep eating your veggies!

Jennifer

Tuesday 14 August 2012

Tasty Trifles

I’m not sure what impresses people so much about some layers cake, pudding, yogurt, whipped cream, and maybe a little fruit to deem the dessert semi-nutritious, but dinner guests and potluck attendees always gawk and drool upon seeing a trifle being set out.  


JELL-O Chocolate Cherry Trifle

I think the first trifle I attempted was from a store shelf tear-off recipe.  I just searched through my old paper recipe collections for 20 minutes and actually found it!  My version of the trifle was comprised of Swiss Rolls (chocolate with white filling, a cousin of the Twinkie, instead of the raspberry jelly ones), cherry pie filling, Cool Whip mixed with instant vanilla pudding, and grated Baker’s semi-sweet blocks.  The Black Forest-type dessert was a hit! 
It took a little time but I found a link to the recipe via Valley Heritage Radio's archived recipes.  Move the scrolling bar down a generous thumb width; you'll find Chocolate Cherry Trifle on the right hand side.  (The recipes are listed in alphabetical order in case my thumb-width estimate doesn't match your thumb or screen zoom level.)
 
  
Triple Berry Trifle

A few years later, when I became a Pampered Chef consultant, I became acquainted with the Triple Berry Trifle.  I made it at a few cooking shows and even whipped one up at a picnic table for friends at our church’s youth camp!  In fact, the photos below were taken on my parents' motorhome table.  The creamy filling was a blend of Light Cool Whip and fruity yogurt, with layers of blueberries, strawberries, and raspberries, and cubed angel food cake.  That summer, our local bakery dabbled in lemon angel food cakes; that made the trifle even better as the recipe called for a bit of lemon zest to be mixed in with the berries.  Yummy! 


The garnish on the top of that dessert was a strawberry fan.  Strawberry fans look fairly impressive; remember how the roses on the birthday cake used to be something to fight for?  Same deal, just updated for the 2000’s. 
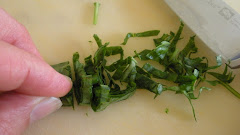
  • If you have an egg slicer or Pampered Chef Egg Slicer Plus, take a firm, medium-sized berry, place it upside-down on the slicer so the stem is down, and hold the berry firmly as you pull the metal wire piece down over the pointy end of the fruit.  Leave about ½ cm / ¼ “ from the stem so the strawberry doesn’t come apart; it’s supposed to look like a fan, not roadkill. ;-) 
  • If you don’t have a slicing gadget, just lay the berry wide side down on a cutting board, and make evenly-spaced ½ cm / ¼ “ slits to the same distance from the stem. 
Holding the berry around the top, gently spread the pieces apart to make the fan shape.  Pretty!
If you would like a recipe, here's a link to the RazzleDazzleRecipes website's collection of Pampered Chef recipes.  (Interestingly, the RDR site is copyrighted but I couldn't find any info which indicated the author had permission to post the PC recipes...I'm still going to play it safe!)
  

Chocolate Banana  Cream Trifle
 
Then back to chocolate it was, this time with its friends: bananas and graham wafers.  In this Pampered Chef recipe, the semi-crushed wafers stood in for the usual cake element.  A double batch of instant chocolate pudding and about a litre / 4 cups Light Cool Whip provided the squishy goodness, and an egg slicer made the uniform banana slices.  I played around on the top by drizzling some chocolate ganache or chocolate syrup on top, inserted banana slices at a diagonal, and sprinkled wafer crumbs over it all. 


If you would like a recipe, here's a link to my Google search for one; sadly, I could not find a guaranteed legal copy of the instructions to post here. 


Strawberry Chocolate Trifle
  
Sometimes, I’ve just mucked about with things.  During Lent, we try to abstain from meat, dairy, and eggs for forty days.  This can make church lunch contributions tricky, especially in the dessert department.  I mean, not to be ungrateful, but one can only love to see a fruit platter on the sweets table for so many Sundays!  I have a Skor cake recipe, handed down from many people, which only has water, vinegar, oil, and vanilla for wet ingredients.  Light Cool Whip is an edible oil (vs. dairy) product so that works, and fruit is always a go as well.  From those items, I made a chocolate-strawberry trifle, decorating the top with heart-shaped-looking strawberry slices and Oreo crumbs.  (I didn’t check the ingredients on the crumbs so may have erred in following animal product-less guidelines.) 


The cake recipe is as follows:

Chocolate Cake sans Skor

Preheat oven to 350 F / 180 C for metal pan or 325 F / 162 C for a glass pan.
Prepare a 9 x 13" pan with baking spray containing flour (Pam Baking Spray, Baker's Joy) or by greasing the pan with vegetable oil and sifting cocoa to lightly dust bottom and sides.
Stir the following dry ingredients together in a large bowl.
3 cups + tbsp     all-purpose flour                780 mL
2 cups               granulated sugar               500 mL
2 tsp                 baking soda                       10 mL
1 tsp                 salt                                   5 mL
6 heaping tbsp    cocoa, *sifted   6 x heaping 15 mL
                       (For any newbie bakers, if there is a comma followed by 'sifted,' 'melted,'
                        'thrown in the air,' etc., you measure the ingredient and then do the
                        required action to it.)
Make a well in the dry ingredients.
 
 
Measure the following wet ingredients into the well.
2 cups               water                              500 mL
2/3 cup              vegetable oil                    150 mL
2 tbsp                vanilla                              30 mL
2 tbsp                vinegar                             30 mL
Stir just until combined.  Pour into prepared pan and bake for 40 minutes.  Check at 30 and 35 minutes; the cake is done when it springs back when pushed down gently in the middle and the sides are coming slightly away from the pan.  The old toothpick-stuck-in-the-center-comes-out-clean trick works, too.  Let the cake cool, then cut into 1" / 2.5 cm cubes with a serrated knife if making into trifle.

 
Pumpkin Gingerbread Trifle

For Thanksgiving 2009, I wanted to serve a trifle featuring the comforting autumn-associated spices of cinnamon, nutmeg, and allspice, as well as pumpkin.  After doing some GRR (Google Recipe Research), I combined a Pampered Chef recipe with one from Paula Deen, Southern Belle o' the Butter. Paula's suggested using gingerbread mix; the PC's version included toasted angel food cubes.  I love gingerbread (the cake kind) so I made up one from the first cookbook with Canadian Diabetes Association food choice symbols my mom had ever purchased.  The recipe for Nova Scotia Gingerbread makes a nice, dense cake, and is one of my “Ack! Company’s Coming In An Hour!” dessert standbys since I almost always have the ingredients in my pantry.  I baked the cake in a larger pan than called for so it would only rise to about 1” / 2.5 cm.  When cooled, I cut it into cubes, and layered it with the creamy filling. 

Pumpkin Filling

3 cups                milk                               750 mL
1 cup                 pure canned pumpkin        250 mL
                         (not pumpkin pie filling)
2 pkg.                instant vanilla pudding         2 pkg.
                         (4 serving size each, sugarful or sugar-free)
1 1/2 tsp            cinnamon                           7 mL

Whisk these ingredients together in a big measuring cup, bowl, or Classic Batter Bowl until smooth.  Fold in 2 cups / 500 mL thawed Cool Whip or more if you'd like to make more volume of filling or find the taste too pumpkiny.

               
         Though these pictures may look like they are not cropped or else cropped oddly, there were significant
         reasons for showing them this way.  My mom's side of the family was having a combined celebration of 
         Thanksgiving and Grandma Eigner's birthday.  I love the decorations my Auntie Connie added to my 
         Grandma's angel food cake in honour of her love of pansies.   The hands above the trifle belong to my
         Grandpa Eigner; it was his last Thanksgiving with us.

Similar recipes to the gingerbread cake one I use include these two on Epicurious or Robin Hood.ca.  The latter recipe includes nutritional information.  Now I'm looking forward to fall to make this dessert again!


Peanut Butter Trifle

The most recent trifle served at Godziuk functions has been the Peanut Butter Trifle.  I think we – okay, I, having been requested to by the other family members – made this about four times this spring for Easter, Miriam’s family birthday “cake,” and two other occasions.  (Remember last post’s comments about our cuckoo-busy springs?  Memory fails me…)  I “met” this recipe on Pinterest this year, its lovely photo causing me to do the Homer Simpson drool. 


I made a few alterations to the recipe:
  • used Skor cake recipe above vs. brownies for the cake layer
  • made 2 x 4 serving instant sugar-free chocolate pudding mixes with 4 cups of milk
  • used 1-1.5 L of Light Cool Whip instead of whipping cream and did not add sugar
  • added 2 cups vs. 1 cup of Cool Whip to peanut butter mixture since the p.b. mixture is really thick as well as getting more volume out of it
  • sometimes included chopped peanut butter cups in the layers, sometimes didn't; for Miriam's b'day one, I used the mini Reese's Cups to make a "12"
  • topped trifle with chocolate pudding, chopped peanuts, Cool Whip rosettes
 *Note: When following the "How Sweet It Is" blog recipe, you don't have to follow the link to the peanut butter pie recipe; all of the ingredients and steps are listed adequately.  However, if you follow that link to the "Say It With Peanut Butter Pie" page on the same blog, there is a really touching story linked to the blue word "pie" a few lines of text under the picture.   The story is from the blog "In Jennie's Kitchen."  Get Kleenex...


My Last Thoughts on Trifles...For Now

Cake Layers

If you're inventing your own trifle and considering the starch part, you'll have to choose whether you want
  • something that'll soak up moisture (angel food, regular cake-mix cake, soft ladyfingers, sponge cake),
  • something with some density to it (brownies, gingerbread, pound cake) to stay firm, or
  • something with crunch (whole or crushed cookies/wafers, firm ladyfingers).  
The latter two will offer a greater contrast in texture to the pudding/yogurt/whipped topping layers.  It's Squishy versus Starchy!
 
 
Whipping Cream vs. Whipped Topping

Some trifles call for whipping cream in the squishy layer.  What I found was that the whipped cream deflated and made for soupy layers.  Therefore, I had been more inclined to use Light Cool Whip to maintain the height of the trifle.  I mentioned this to some of my friends last month, and they informed me that you can buy a stabilizer for whipped cream so it doesn’t go flat!  It has a very tricky name:  Whipped Cream Stabilizer.  Thank you to the ladies who informed me of the product; sorry that I can’t remember which of you it was!


Take care until you return to the island, and I’d love to hear what you like to mix-and-match when making your own trifle-icious treats!


Jennifer

Tuesday 7 August 2012

For the Love of...Tomatoes & Fresh Mozzarella!

People who know me are aware that I have a brown thumb.  I joke that I can take care of my children OR plants...pick one.  Larry and I chose a spot for a garden after a few years on our acreage.  The next year, we cut out some of the weeds and stick trees.  The following summer: we borrowed by Dad's rototiller and dug up the dirt.  Repeat and repeat the last step.

You see, May and June are really busy for our family.  There is a short spring football season, about 5-6 weeks, meaning we may get home by 8:30 p.m. when coaching and practicing are done, and during those months, all four of us are finishing off our respective school years.  Making and eating a freshly-made meal (not frozen, not reheated, not from Subway, A&W, or DQ) is a treat - with the whole family seated together is a bonus.  Having clean clothes and making sure the home will not be condemned by a health inspector are also worthy goals.  Therefore, gardening is nowhere near the top of the list, and, sadly, some of the house plants don't even make it...

Although I'm no horticulturalist, I respect and appreciate others' talents on display in their gardens, yards, pots, and window boxes.  I would say that my favorite garden-grown treat is a sun-warmed tomato: the vine has a wonderful, savory smell and the temperature of the tomato is perfect.  Today I'll share some of my favorite things to make with tomatoes and fresh mozzarella.


Tomato & Bocconcini Skewers

The Italian word for fresh mozzarella is bocconcini.  Around here, one can find it around the deli near the ricotta.  Bocconcini comes in a tub in a few different sizes:  regular ones are egg-sized and the littlest ones are Cocktail size, about as big as large grapes.  It's stored in whey or water so you have to fish it out.  The fresh cheese has a bit of a spongy texture; not everyone loves it, but you might want to give it a try.

I saw a picture on Pinterest of caprese skewers so my BFF from Calgary, Laurel, and I made up some "appies" (as she always calls them) on Miriam's birthday weekend.  We made them, adding some crusty focaccia squares for texture, and enjoyed them so much that we made a second batch!

Ingredients 
  • Focaccia bread (bought or made from an easy recipe such as this one from www.allrecipes.com [omit cheese topping])
  • Olive oil
  • Balsamic vinegar
  • Cocktail, cherry, or grape tomatoes
  • Bocconcini
  • Fresh basil leaves
  • 6" wooden skewers or smaller ones if you want to make minis

Directions

If you're baking your own bread, start making that first.  When we ran out of store-bought focaccia and the store didn't have any more, my hubby whipped up the linked recipe above; he said it was really easy and I was very impressed and appreciative!

Pour 1 cup or more balsamic vinegar into a small, heavy-bottomed saucepan and boil down to half the volume.  It will become a sweet, delicious balsamic syrup.  Pour into a small container to cool.

While syrup is cooking, cut cocktail tomatoes in half (the other types will be small enough to leave whole).
Cut bocconcini to desired side, about the same as your tomatoes.

Split the bread as you would a bun, place the cut sides up on a baking sheet, and broil for a few minutes in the oven to toast it (I put it on the 2nd-from-the-top rack).  Brush with a bit of olive oil when you take it out of the oven.  Remove from the pan and allow bread to cool on a rack.  This will help the bread stay crunchy.  Cut pieces of focaccia about 1" / 2.5cm square.
*Note: Do not leave broiling bread unattended to check your Facebook, change laundry, or any other activity, lest you have to down-grade the appetizer/snack into a starchless salad!

Wash basil leaves in cold water and pat dry with paper towel. 

To assemble, thread pieces of bread, cheese, tomato, and basil on the skewer; drizzle with balsamic syrup. 
 Ours looked like this:
The bottom basil leaf escaped from its position around the cheese.  Oops!


Tomato Salad

Since being diagnosed with Type I (insulin-dependent) diabetes in 1992, I have usually cooked from recipes with carefully-measured yields and accompanying calculated grams of carbohydrate, fat, protein, etc. Recipes with listed ingredients but no measurements kind of freaked me out! There is now a lot of data online and programs to figure out carbs per serving so that helps a lot with adjusting insulin dosages for meals and snacks. I'm learning to experiment a bit more with recipes so I hope you will measure with your eyes and tastebuds until it looks and taste great to you.

Ingredients
  • Cocktail or whole tomatoes, variety of colors
  • Fresh mozzarella (optional)
  • Fresh basil leaves
  • Olive oil  (I like regular vs. the green extra-virgin for this)
  • Balsamic vinegar (optional)
  • Salt
  • Freshly ground pepper

Directions

Cut tomatoes into 1" / 2.5cm chunks and mozzarella into preferred size; place in medium-sized bowl.

Chiffonade (shiff-fuh-NOD) the basil.  (You can also do this to other flat leafy herbs like mint.) 

         
               Stack the leaves.                   Roll tightly, forming a cylinder.             Slice off little ribbons using
                                                                                                                             a sharp knife.   

Add basil to tomatoes & cheese; gently mix.

Drizzle with some olive oil; perhaps start with a tablespoon / 15mL so it's not too greasy.  (You can add more to taste after all ingredients are added and you've tried it.) 

Drizzle about a half-tablespoon / 7.5mL of balsamic vinegar. 

Sprinkle with a teaspoon / 5mL of salt and grind pepper over the top. 

Stir gently, taste, and add more of any of the last four ingredients you think would make it more delicious!


I would've added more red tomatoes but a certain teenaged boy had enjoyed them...  But, hey, who could blame him?  He has good taste.


Caprese Pizza

This was the first recipe in which I used bocconcini.  My family weren't sure what to think of the new cheese but they gobbled up the pizza. 

When I had to Google the recipe the other day from the grocery store, I found a new website called Tastebook.  It has a deal with Random House, the largest publisher of cookbooks, so I hope all of the copyright issues are covered! 

Here is the recipe; we found the original version, pictured here, a bit greasy, so now we just sprinkle the chiffonaded basil on top of the pizza at the end instead of mixing it with oil and brushing that mixture on.


Caprese Platter

Lastly, I put together a tray of many of the aforementioned ingredients with which to make open-faced sandwiches.  There is balsamic syrup in the silver dipping bowl.


Whew, that was a long post!  It took me a few days.  I promise not all will be so long!

I hope you were inspired to play with some variations on tomatoes and bocconcini from the island.


Jennifer


Thursday 2 August 2012

Saskatoon Time

One of the many pleasures of living on our acreage is being bordered on two sides by forest, including wild saskatoon trees and raspberry bushes.  Last year, the mosquitos were so awful that I only picked 1 cup of saskatoon berries in total...the whole summer!  That was very disappointing as the recipe I found and made in 2010 for saskatoon crisp required 5 cups.  This year, to my delight, the weather around here in spring and summer has produced a plentiful crop of large purple berries, and the mosquitos aren't bad at all as long as you're covered up by sundown.  I did have an unpleasant encounter with a few red ants when I forgot about the ant infestation around our wood box.  Literally, I had ants in my pants!  Not fun, I tell you, and I only had three on me in total and received one nasty bite.
                           
Two years ago, when I found the delightful recipe from which I produced this...

 ...I decided to bookmark the web page, saving paper.  If you don't know me personally, I try very hard to recycle and conserve resources.  This time, however, my efforts BACKFIRED!  The recipe is no longer posted.  Perhaps they got nailed for copyright...  Lesson learned:  Print one copy of worthy recipes.

I looked around at other recipes (grumble, grumble).  Most are very similar for Saskatoon Crisp: basically, a whack of berries mixed with a wee bit o' white sugar, covered with a mixture of equal parts flour, brown sugar, oats, and cold butter.  If you are blessed with lots of berries and favourable conditions (e.g. bug-free, reasonable temperature), go for a double batch.  This recipe is for a single batch, though, just so no one feels they are an inadequate s'k'toon picker.  It's okay.  Some years are just like that.  The further the dessert fits up the dish, the better it looks, I think!  And if you are a crispy topping-lover like me, you might even want to double the topping for a single recipe; when I made a double batch (8 cups of berries) in a 9" x 13" pan, double-and-a-half the topping worked out well.


Here is my version of Saskatoon Crisp:

Preheat your oven to 350 F/ 180 C. 

Berry Bottom
4  cups   saskatoons          1  L
1/4 cup  white sugar        60 mL

Mix these two ingredients and spread in an 8" x 8" pan or small round French White casserole. 

Notes:  *If you bake it in a stoneware casserole, it'll be purplish-brown afterward.  I'm sure it'll
             come off in time, plus your food usually covers it up anyway.
           *Some recipes recommend adding 2 tsp./10mL lemon juice to the saskatoons and sugar;
             the acid is supposed to help the berry juice thicken but I didn't notice much of a
             difference between the two versions once they had cooled off.


Topping
1/2 cup   flour               125 mL
1/2 cup   brown sugar    125 mL
1/2 cup   rolled oats       125 mL (not instant - I like the Large Flake so the top is crunchy and
                                                                 chewy, but quick oats would work, too)
Stir these together in a medium bowl. 

Cut 1/2 cup (125 mL) cold butter into small cubes (1/2" / 1 cm-ish).  Use a pastry blender, a potato masher, your clean hands, two butter knives, Mix 'N Chop tool, or whatever else works for you to mix the butter with the other topping ingredients until you have the often-quoted recipe phrase "butter is the size of small peas." 

   
           Saskatoons + Sugar                        Nice & deep in the pan           Butter pretty much the size of small peas  ;-)

Pour your topping mixture over the saskatoons and give it a little love-pat all around.  It shows you care, like tucking the blankets around your children at night; it's just the right thing to do.

Bake on the center rack until the delicious juices are bubbling up out of the crust and the topping is nicely browned, about 30-45 minutes. 

*Note: If your mixture is nearing the top of the dish, place a large cookie sheet underneath so it doesn't make a big mess on the bottom of your over if/when it bubbles over.

        
                                   Before                                                                       After
Juicy deliciousness!

Let it cool for at least 30 minutes so the juices thicken a bit.  If you can't wait that long, it'll be quite liquidy on the bottom, but equally delicious when the juices mingle with some vanilla ice cream!


I appreciate that you made an initial or return visit to my island.  Now back outside to pick more saskatoons! 


Jennifer

P.S.  I actually am, right after I post this. I'm all about the honesty; my mother's excellent detective skills discouraged me from fibbing at a young age.  I learned she'd always find out so it was better just to try to be good and honest in the first place!  I love you, Mom! ;-)